Custom Blocklists
Custom blocklists let you apply your own threat intelligence through CrowdSec. Create a private list of IPv4 addresses, IPv6 addresses, and CIDR ranges, then subscribe the Security Engines or integrations that need it.
Custom blocklists are available on the Premium and Enterprise plans.
When to use a custom blocklist
- Respond to an incident. If your team confirms repeated attacks against a public login service, add the malevolent IPs to a custom blocklist.
- Apply trusted threat intelligence. Import IP addresses and ranges from your security team or a trusted partner.
- Control where the policy applies. Choose specific Security Engines or Integrations for a service-specific threat.
- Keep protection current. Add newly confirmed addresses, remove entries that no longer warrant blocking, or replace the contents with an updated set.
Create a custom blocklist
Open Custom Blocklists in the Console and click Create blocklist.
Enter a Name and Description so teammates know what the list covers. Then, provide one IP address or CIDR range per line, or choose or drop a plain-text .txt file. Blank lines are ignored. Select Ignore invalid entries to skip malformed lines and keep valid ones.
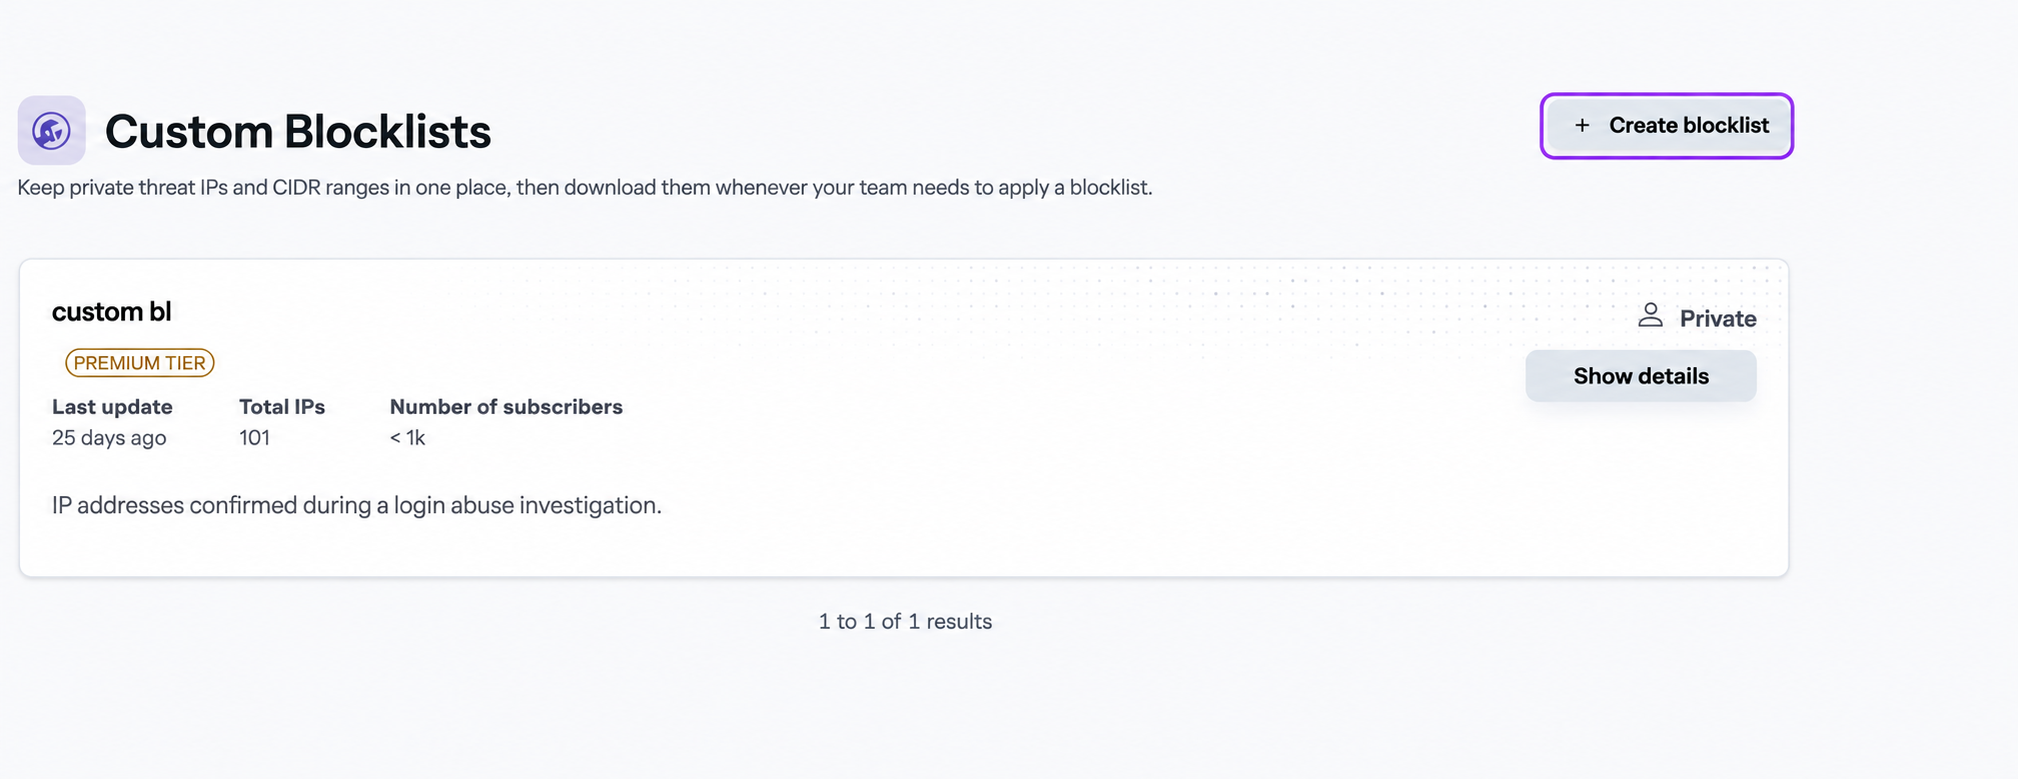
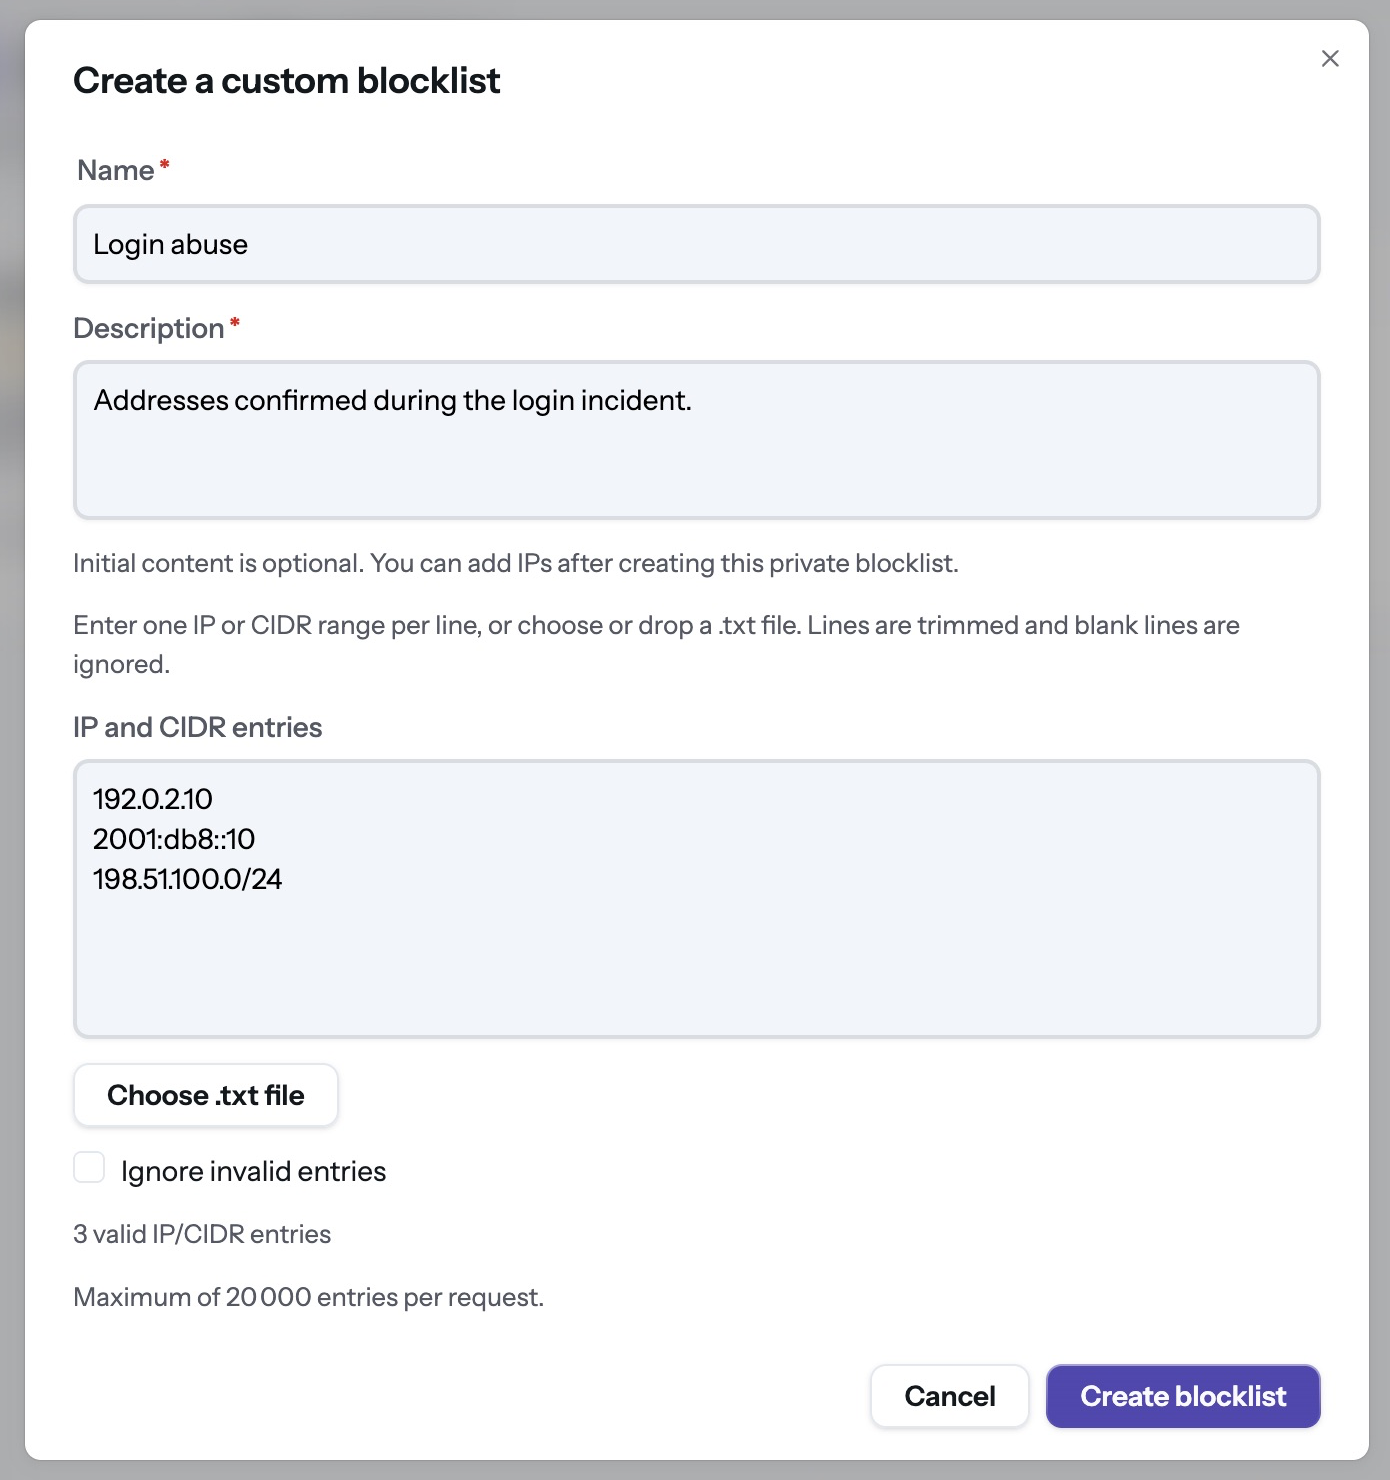
Creating a list stores the entries. Subscribe an asset to put the list into use. If you create an empty list, you can add entries later.
The Console supports up to 10 custom blocklists, each accepting up to 20,000 entries.
Subscribe to a custom blocklist
Your organization’s custom blocklists are under Blocklists → Custom. CrowdSec’s blocklists are in the Catalog.
- Open your list from Custom and click Subscribe.
- Choose Entire Organization, Security Engines, or Integrations. For a targeted subscription, select the systems you want to protect.
- Choose a remediation and click Confirm subscription.
- Check Subscribers on the list details page to verify that the intended target appears.
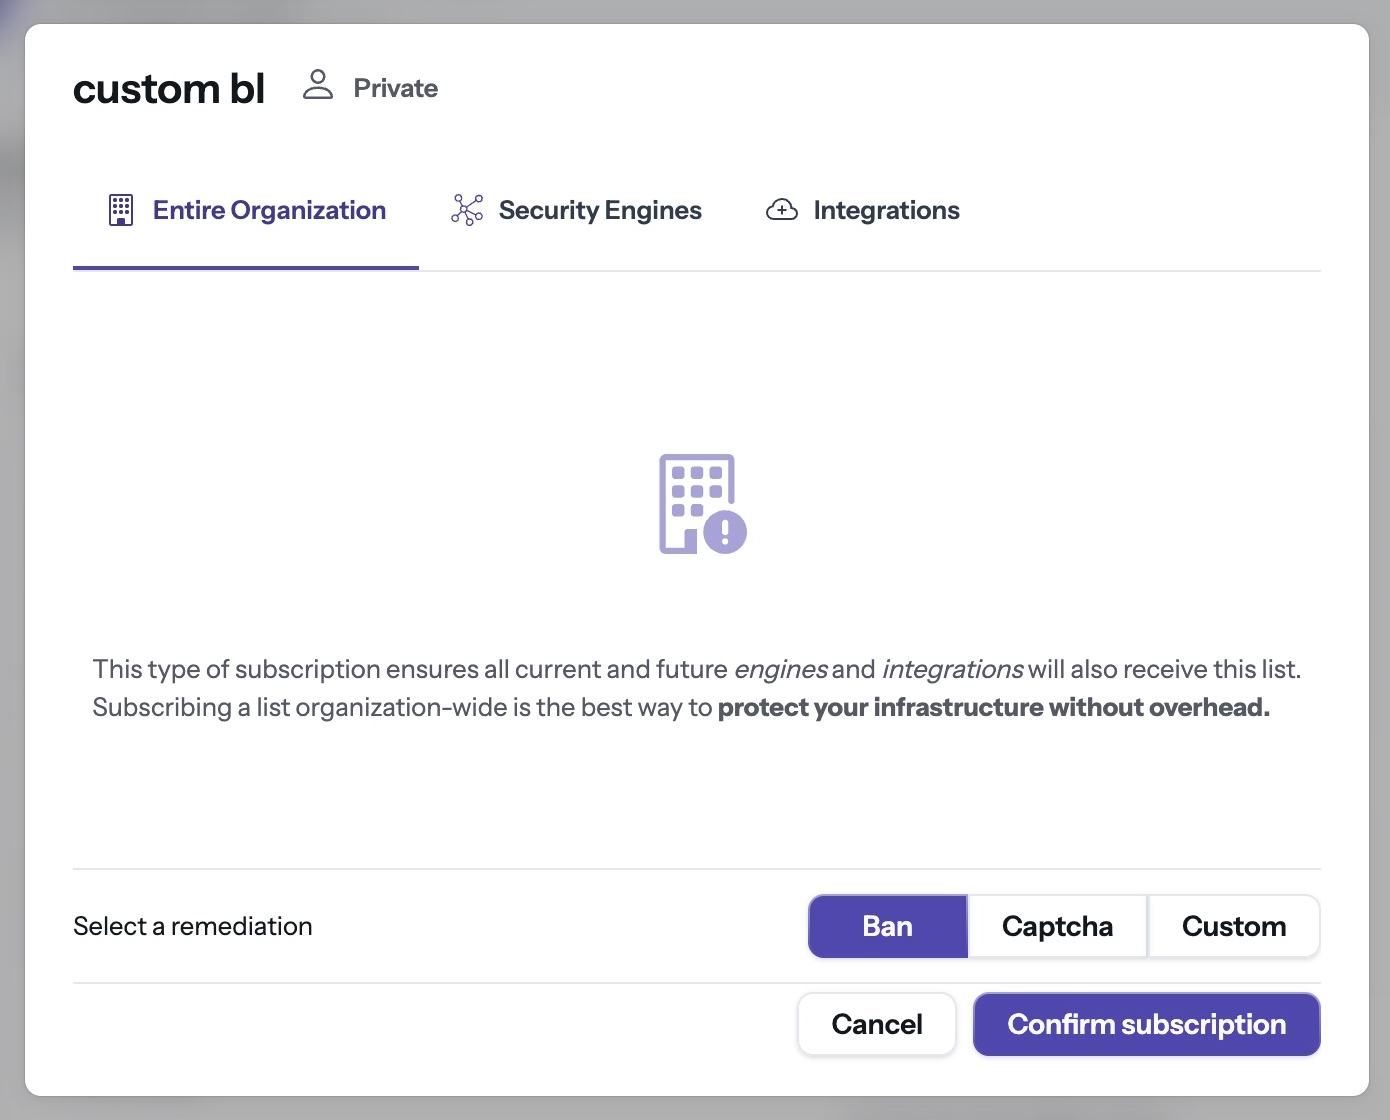
For more on subscription scope and remediation, see Blocklist Subscription.
Manage a custom blocklist
Open a list from Blocklists → Custom to view its details.
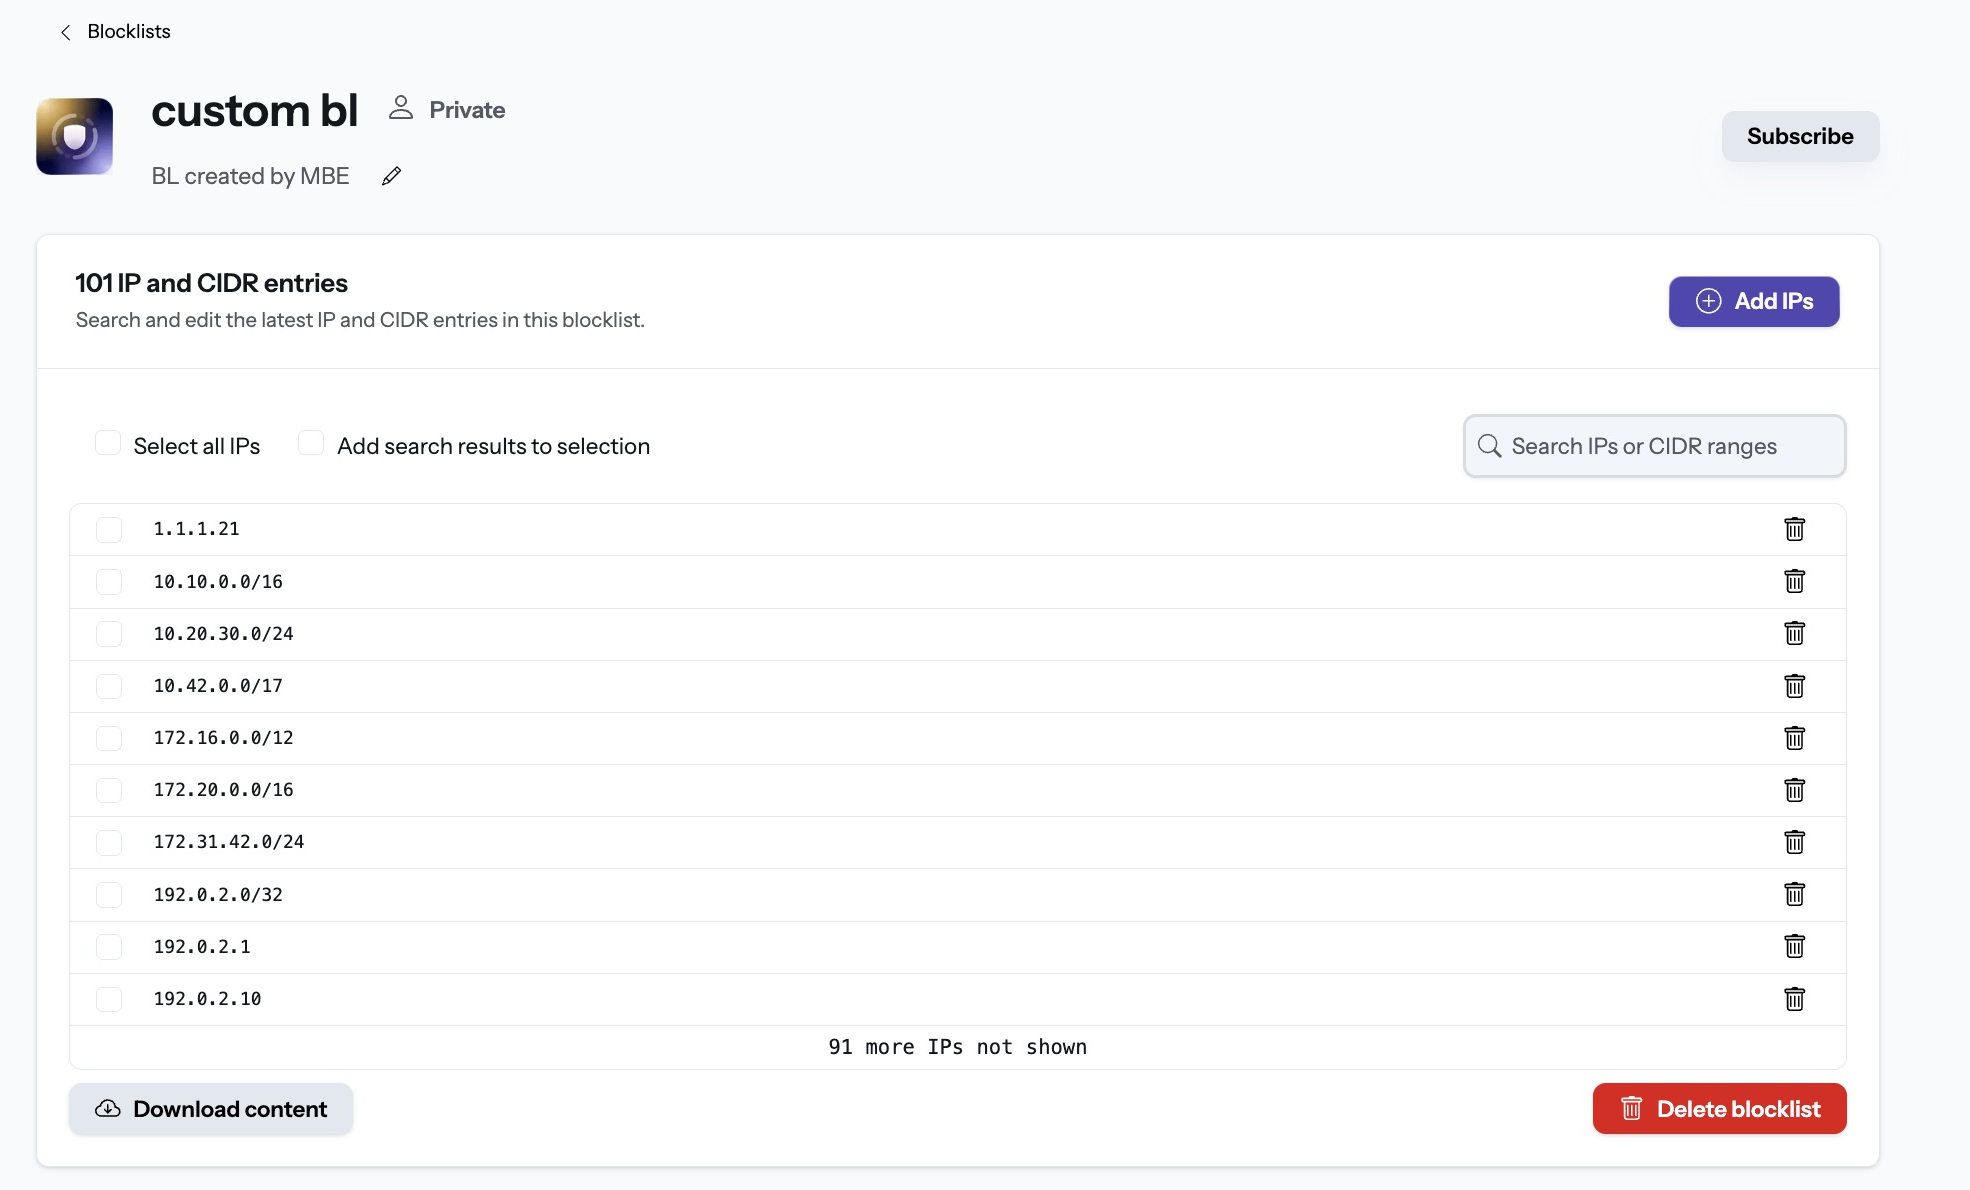
- Find or export entries. Use Search IPs or CIDR ranges to search the full list. The details page displays a limited set of rows. Use Download content to export the full list.
- Add entries. Click Add IPs, paste entries or choose a
.txtfile, and click Review changes before confirming. - Replace entries. In Add IPs, select Erase the existing blocklist content, then click Review changes. Review the replacement count before clicking Confirm replacement. The new batch replaces all existing entries.
- Remove entries. Use the delete control beside an entry, or select several entries and confirm their removal. Select all IPs selects the full list, including entries outside the visible rows.
- Rename the list or update its description. Click the pen icon nearby the blocklist description at the top of the page.
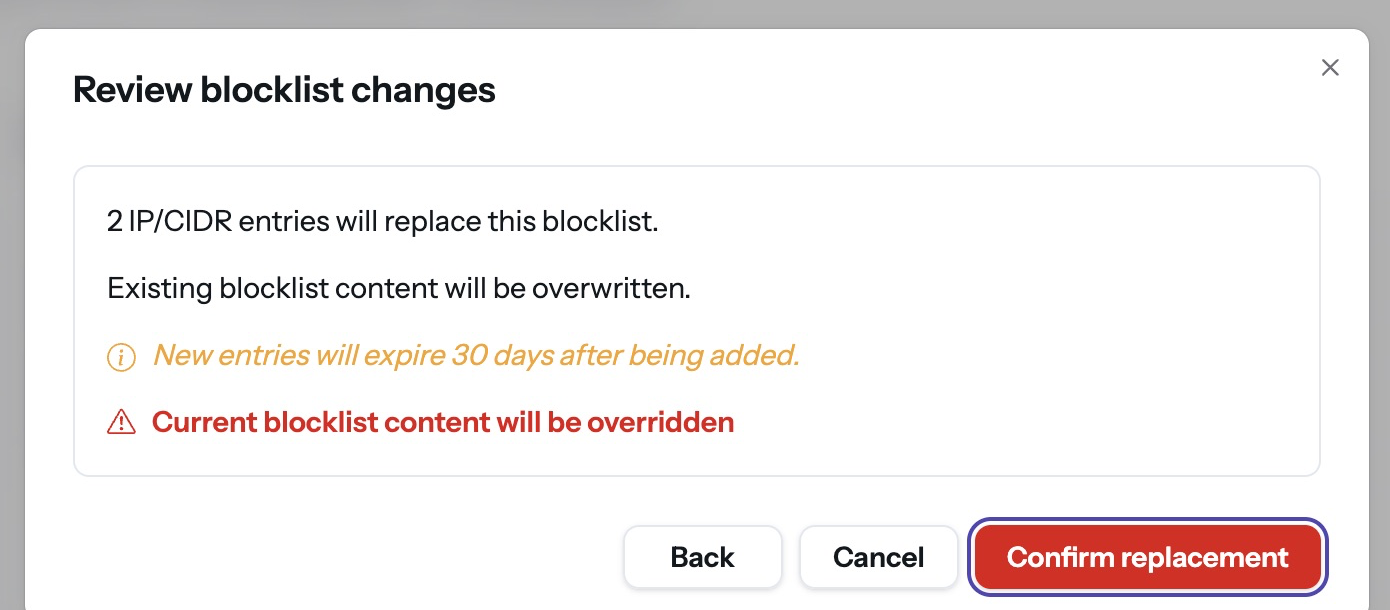
Entries added or replaced through Add IPs expire 30 days after being added.
Delete a custom blocklist
On the list details page, click Delete blocklist and review the confirmation. Deleting the list permanently removes its contents, subscriptions, and any sharing. Subscribers lose the protection provided by that list.